How to Plan a Home Renovation: A Step-by-Step Guide (Without Costly Mistakes)
Here’s something many homeowners don’t expect: more than half find their DIY renovations take longer than planned. While saving money motivates around 60 percent to take on the work themselves, one in three eventually hires professionals to fix what went wrong.
In areas like Poway and San Elijo Hills, a full home renovation typically costs between $100 and $200 per square foot. Timelines can range from three months to a full year, and design fees usually account for 10 to 15 percent of the overall budget. Experts recommend setting aside at least 15 percent as a buffer to manage surprises along the way.
This guide will walk you through the essential steps for planning a successful home renovation. You’ll learn how to define your goals, create a realistic budget, and assemble a team you can count on. With the right approach, you can avoid the common pitfalls that turn dream projects into financial headaches.
Table of Contents
- 1 Step 1: Define Your Renovation Goals
- 2 Step 2: Set a Realistic Budget and Timeline
- 3 Step 3: Why Structural Treatment Matters During Renovation
- 4 Step 4: Build the Right Renovation Team
- 5 Step 5: Don’t Overlook Underground Utilities
- 6 Step 6: Plan the Design and Execution Process
- 7 Set the Foundation for a Successful Renovation
Step 1: Define Your Renovation Goals
Before making design decisions or setting a budget, it is important to understand what you want your renovation to achieve. Clear direction at this early stage sets the tone for the entire project and helps prevent confusion later on.
Taking time to evaluate your space and think through your intentions allows you to move forward with purpose. The more focused your vision, the easier it becomes to prioritize decisions and stay on track as the work progresses.
Clarify your reasons for renovating
My home renovation’s main goal is to make the space work better for my family and me. Renovation experts point out several common reasons why people improve their homes:
- Increasing comfort and enjoyment – This should be your top priority. Your home might end up feeling like a showplace instead of a comfortable space if you only think about resale value.
- Addressing safety concerns – You can’t ignore electrical problems, roof leaks, or foundation cracks. These issues need quick attention to avoid major damage.
- Improving home value – Projects like opening living spaces or updating kitchens will give you better returns if you plan to sell soon.
- Improving functionality – Life becomes more convenient when you add space, build a second bathroom, or create outdoor entertaining areas.
- Optimizing efficiency – New windows and better insulation can lower your energy costs and make your home more attractive to buyers.
List must-haves vs. nice-to-haves
Two simple lists – “Need To Do” and “Want To Do” – help you prioritize renovation projects. Walk around your home and note any problems that need attention for the “Need” column. Your “Want” column should list improvements that would make living there better, even if they aren’t urgent.
Specific items work better than broad goals like “Total Kitchen Makeover”. This detailed approach helps manage the planning process and budget allocation better.
Your home’s systems connect to each other. Sometimes fixing a necessary repair also takes care of something from your wish list, which makes the renovation more efficient. This smart approach helps you invest in improvements that deliver value now and in the future.
Step 2: Set a Realistic Budget and Timeline
A well-planned renovation begins with a solid understanding of what it will cost and how long it might take. Establishing these details early helps avoid unnecessary stress and prevents delays that can slow down progress.
A clear financial picture also gives you the confidence to make informed choices and adjust plans when needed. With the right preparation, your renovation can move forward smoothly, stay within limits, and bring lasting value to your home.
Estimate costs for each area of the home
Home renovation costs typically range from $19,000 to $88,000. Most homeowners spend around $52,000. Each room comes with its own price tag:
- Kitchen remodels: $6,000-$40,400
- Bathroom renovations: $6,000-$28,000 [73]
- Bedroom updates: $1,500-$5,500
- Living room refreshes: $5,000-$10,000
My research needs to cover both material and labor costs. Online calculators give rough estimates. Getting actual quotes from contractors provides more accurate numbers for my specific project.
Include a 10–20% contingency buffer
Setting aside extra money for surprises makes sense. Expert advice suggests keeping 10-20% of the total budget as backup. Simple projects like flooring or painting need just 10%. Complex renovations with structural changes, electrical work, or plumbing need 20% extra protection.
This backup money proves vital since many homeowners – about 39% – spend more than planned. Project size affects this percentage too. Small renovations under $30,000 need 10-20% extra, while bigger projects over $100,000 might only need 3-8%.
Decide on funding: savings, loan, or equity
My renovation funding options look like this:
- Cash/savings – This option saves money with zero interest costs
- Home equity loans or lines of credit – Borrowing up to 85% of home value minus existing mortgage works well
- Cash-out refinance – A larger mortgage replaces the current one and provides renovation cash
- Personal loans – Quick approval comes with higher interest rates
- Government programs – HUD Title I property improvement loans or 203(k) rehabilitation mortgages help qualified homeowners
The funding choice needs careful consideration. Understanding all terms and repayment requirements comes before starting any renovation plans.
Step 3: Why Structural Treatment Matters During Renovation
The life-blood of every successful home renovation project lies in its structural integrity. Homeowners often get caught up in looks and functionality. They tend to overlook crucial structural elements that keep their homes safe and stable over time.
Safety stands at the forefront when we tackle structural issues during renovation. Your family faces serious risks from structural problems such as foundation cracks, sagging floors, or changing walls. These issues can lead to devastating damage that puts your property and personal safety at risk.
More importantly, finding and fixing structural problems early stops further damage. Small foundation cracks can quickly turn into major structural failures when ignored. My experience shows that consistent monitoring and inspections help maintain structural code compliance.
Renovations often reveal these common structural problems:
- Poor-quality changes that damage load-bearing walls
- Timber floor structures rotting from dampness or poor ventilation
- Foundation issues that need underpinning or rebuilding
- Drainage problems leading to water damage and floods
In some cases, especially in modern or large-scale renovations involving steel reinforcements, contractors may use advanced methods to strengthen structural components. One such method is induction heat treating, a precise and efficient process that improves the durability of metal elements without compromising surrounding materials. If you’re unfamiliar with how induction heat treating works, Team, Inc. offers a helpful overview of this technique and how it’s used in structural upgrades for long-term resilience.
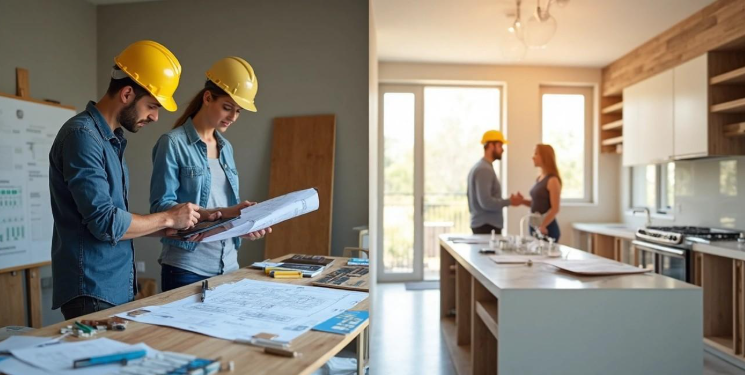
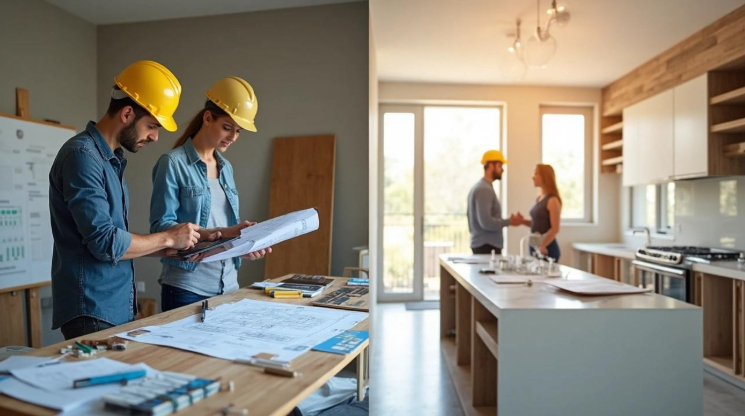
Step 4: Build the Right Renovation Team
The people you bring into your renovation project will shape the entire experience. A strong team provides support, expertise, and clear guidance through each phase. Working with professionals you can trust creates a smoother process and helps prevent costly setbacks.
With the right team in place, your vision becomes easier to execute and the results more likely to match your expectations.
Hire a licensed general contractor
Your first priority should be finding a licensed general contractor with proper insurance coverage. A licensed professional brings project management experience to make sure your renovation finishes safely, stays within budget, and meets all codes. You should verify their license through your local licensing board and ask for proof of liability insurance and workers’ compensation.
Look beyond technical qualifications for a contractor who communicates well, since they’ll be in your home for quite a while. Pay attention to how well they listen and respond to your ideas during your first meetings. A skilled general contractor coordinates various subcontractors, handles material purchases, and makes quick decisions when problems come up.
Work with an interior designer or architect
Architects turn your vision into a cohesive design and help you understand zoning laws and building codes. They assess needs, create detailed plans, work with contractors, and make sure everything stays legal.
Interior designers handle projects from start to finish in much the same way. They weave your lifestyle needs into every step and make sure your specifications stay on track during construction. Getting these professionals involved early leads to better teamwork and helps avoid expensive changes down the road.
Check references and past projects
Before you hire anyone, get a full picture of their references and past work. Ask each contractor for at least three references and find out about:
- How well they stuck to timelines and managed budgets
- Their communication style and problem-solving skills
- Job site cleanliness and crew professionalism
- Whether the client would hire them again without hesitation
Try to visit a current work site to see their safety practices, cleanliness, and how workers conduct themselves. Note that checking references remains one of your best tools for ensuring a great renovation experience.
Step 5: Don’t Overlook Underground Utilities
Many homeowners overlook the hidden dangers of underground utilities when they plan renovations. Damaging these invisible infrastructure components can lead to serious injuries, property damage, and repairs that can get pricey – costs that weren’t part of your original budget.
You need to know what lies beneath your property before any digging starts. Local laws require homeowners to contact utility locating services 48-72 hours ahead of excavation. A simple call to 811 brings representatives who mark public utilities with color-coded paint or flags.
These markings show several vital underground systems:
- Water and sewer lines (blue/green markings)
- Electrical cables (red markings)
- Gas pipelines (yellow markings)
- Communication lines (orange markings)
- Irrigation systems (often unmarked by public services)
The next step is to add these findings to your renovation plans. Your architect or contractor should adjust designs to avoid utility conflicts or plan for relocations. Remember to get permits for any utility changes — unauthorized modifications can result in big fines.
Private utility location services cost between $250–$1,000, depending on your property’s size and complexity. This might seem like extra expense, but think over this: hitting just one utility line could cost thousands in repairs, create dangerous situations, and stop your renovation for weeks.
If your renovation is in California, working with experienced professionals like BloodHound, who provide trusted private utility locating services in California, ensures that nothing critical gets missed beneath your property. Their specialized equipment and regional expertise can help you prevent delays, hazards, and costly mistakes.
Step 6: Plan the Design and Execution Process
Your renovation vision becomes a concrete plan of action during the design and execution phase. This vital stage connects planning and construction. Everyone needs to understand the work to be done and how it will happen.
Finalize layout and material choices
Working with your designer is significant at this stage. You’ll turn ideas into practical plans that line up with your vision. A well-prepared foundation leads to a smooth remodel and helps the project move forward confidently.
Material selection requires you to think about durability, resistance to wear and tear, and esthetic appeal. Kitchen and bathroom materials need extra attention, especially when you have high moisture levels. Your space’s overall design depends on textures, colors, and patterns that match your priorities and your home’s architectural elements.
Use 3D renderings or mockups
3D design renderings show you photorealistic, life-like images of your renovation before construction starts. These high-quality visualizations give you several benefits:
- Better understanding—traditional blueprints can be hard to interpret without design experience
- Lower risks—you spot design flaws and construction challenges early
- Material choices—you see how colors and finishes work together before buying
- Clear communication—everyone stays on the same page
You can customize and experiment with different design options through 3D renderings without making physical changes.
Schedule inspections and walkthroughs
Strategic inspections make sure work meets building codes and quality standards. Your property needs operational utilities and complete work ready for occupancy during final inspection. You can schedule inspections by calling the inspection department or using online systems.
A walkthrough with your remodeler after construction helps identify items for the “punch list” of remaining tasks. It also helps to arrange inspections that confirm your plumbing and electrical work meets local building codes.
Set the Foundation for a Successful Renovation
A home renovation can feel overwhelming at first, but with the right plan, it becomes a manageable and even rewarding journey. Each step in this guide helps you move forward with clarity, avoid common mistakes, manage your budget with confidence, and make choices that support your long-term vision.
With thoughtful preparation, clear communication, and experienced professionals, you can bring your renovation ideas to life. A successful renovation does more than improve your space. It adds comfort, value, and a renewed sense of home you can enjoy for years to come.