Distance Between Range and Microwave
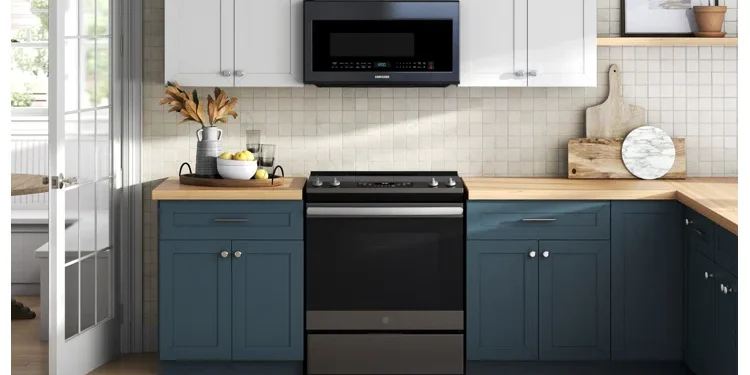
Most homeowners don’t realize how much the distance between their range and microwave matters. The right clearance measurements play a vital role in safety and functionality when you install an over-the-range microwave. Manufacturer guidelines specify 13 to 16 inches of space between the stove’s top and microwave’s bottom. Professional installers suggest a wider gap of 20 to 24 inches to maximize safety.
The standard installation height should reach 66 inches from the floor to microwave’s top. This measurement will give a 13-inch gap between the cooktop surface and microwave’s bottom. Clear guidelines exist, yet many homeowners make mistakes during installation that can damage their appliances, reduce their lifespan, and create safety risks. The National Kitchen and Bath Association states that microwave’s bottom should not exceed 54 inches from the floor to stay accessible. This piece gets into the right over-the-range microwave height, installation pitfalls, and proper measurement techniques to create a safe and functional kitchen setup.
Table of Contents
- 1 Understanding Manufacturer Guidelines
- 2 Common Mistakes in Microwave Placement
- 3 How to Measure the Right Distance
- 4 Venting and Safety Considerations
- 5 Customizing for Your Kitchen Layout
- 6 Summing all up
- 7 Here are some FAQs about the distance between range and microwave:
- 7.1 How do I know if my snake plant has too much water?
- 7.2 Can an overwatered plant recover?
- 7.3 Should I cut off drooping snake plant leaves?
- 7.4 Is it better to overwater or underwater snake plants?
- 7.5 Can a snake plant recover from overwatering?
- 7.6 What does a dehydrated snake plant look like?
- 7.7 How to fix an overwatered plant fast?
- 7.8 Can plants feel pain?
Understanding Manufacturer Guidelines
Proper microwave placement starts with manufacturer guidelines. These specs are the foundations of safety, functionality, and optimal performance of your appliance.
Standard microwave over stove height
Most manufacturers recommend 12 to 13 inches of space between your stovetop and the microwave’s bottom. This gap will give a safe cooking space and protect your microwave from too much heat.
The National Kitchen and Bath Association (NKBA) takes a different approach. They suggest the microwave’s bottom should not go higher than 54 inches from the floor. This creates about 18 inches of space above a standard 36-inch high cooktop – more room than what many manufacturers specify.
Your typical over-the-range microwaves are 12 to 15 inches tall. Kitchens with limited space can use low-profile models that are just 10¼ inches tall. These work great in spots where you’d normally only fit a range hood.
Differences between gas and electric ranges
Your range type plays a big role in how you should install your microwave. Gas and electric ranges need different setups because they work differently.
Gas ranges need specific requirements:
- At least 6 inches of side wall clearance above counter height from combustible surfaces
- Special ventilation with minimum CFM (cubic feet per minute) ratings to clear combustion byproducts
- Ventilation fans must run whenever gas elements are on
- Microwaves can’t go above gas ranges that exceed 60,000 BTUs combined (not counting oven/broiler BTUs)
Electric ranges are simpler. They don’t need any side wall clearance above counter height. Still, experts suggest up to 6 inches to avoid heat damage to nearby surfaces. This happens because electric cooking doesn’t use open flames or create combustion products.
Why 66 inches from floor is a common rule
The 66-inch distance from floor to microwave top has become accessible to more people as an industry standard. This height creates several benefits in most kitchens.
This measurement gives you about 13 inches between your cooktop and the microwave’s bottom front. Your appliance stays protected while remaining easy to use.
The 66-inch height lines up perfectly with standard wall cabinet placement above ranges. Kitchen installation becomes easier and looks better too.
Most adults can safely reach their microwave at this height. The bottom sits around 50 inches from the floor after you subtract the microwave’s height from the 66-inch top measurement.
Professional installers know manufacturer guidelines are just the minimum. Some experts say you should leave 20 to 24 inches above the stovetop. This extra space lets you use bigger pots and makes it easier to see, especially if you’re not very tall.
Common Mistakes in Microwave Placement
Poor microwave placement creates safety hazards and functional problems that homeowners often miss. Small installation mistakes can cut your appliance’s life short and make cooking frustrating. Let’s get into the most common mistakes that affect the space needed between your range and microwave.
Installing too close to the cooktop
The most dangerous mistake happens when people put their microwaves too close to the cooking surface. Manufacturers need at least 16 inches between the stovetop and microwave bottom. Many DIY installations leave only 13.5 inches of space, which creates fire risks.
Safety issues aside, having too little space lets excess heat and steam damage your microwave’s internal parts. This close placement can hurt the electronics and make the appliance work poorly. Some manufacturers might say less than 18 inches is fine, but these guidelines rarely factor in the extra heat from big pots or high-heat cooking.
If your kitchen doesn’t have much vertical space, low-profile over-the-range models about 10¼ inches tall work better than standard units.
Mounting too high for accessibility
While some people put their microwaves too low, others mount them too high. A microwave that sits too high creates ergonomic issues, especially for shorter family members.
High microwaves force you to reach above your shoulders, which strains your arms. This reaching becomes risky when you’re handling hot or heavy items and increases the chance of spills and burns.
One homeowner’s microwave sat at chin level (about 55 inches from the floor), so they couldn’t see inside or safely take food out. The National Kitchen & Bath Association suggests putting microwaves between 24 to 48 inches from the floor for the best ergonomics.
Ignoring pot clearance and user height
Your kitchen needs to work well with all your cooking equipment. Putting a microwave at the standard 54 inches from the floor often blocks large pots on back burners—usually the most powerful ones on most ranges.
So homeowners face a tough choice: put the microwave higher to fit large cookware but make it hard to reach, or keep it lower but lose full stovetop use. This balance gets trickier when kitchen users have different heights.
Kitchen designers point out that a lower over-the-range microwave helps with ergonomics but might make back burners useless for tall pots. Each family should think about who uses the kitchen most and plan from there.
Overlooking venting requirements
Ventilation is often forgotten when placing microwaves. Many people don’t know that over-the-range microwaves come set up to recirculate air through charcoal filters instead of venting outside.
Recirculating vents just filter air and send it back into your kitchen, which doesn’t remove smoke, steam, or cooking smells well enough. External venting works better but needs proper ductwork and more complex installation.
The fans in over-the-range microwaves aren’t as powerful as dedicated range hoods. This becomes a real issue with gas ranges, where good ventilation isn’t just about comfort—it removes combustion byproducts to keep your indoor air healthy.
First-time installers often make these technical mistakes:
- They don’t line up wall templates or mounting brackets correctly
- They fail to anchor into wall studs (vital since microwaves weigh about 50 pounds)
- They forget to leave space for power cords
These small mistakes can affect both safety and how well your microwave works over time.
How to Measure the Right Distance
Accurate measurements are the life-blood of a successful over-the-range microwave installation. You can prevent mistakes that get pricey and ensure safety by taking proper measurements before buying or installing your appliance.
Measuring from cooktop to microwave bottom
You just need to pay close attention to specific measurements when figuring out the right distance between your range and microwave. Most manufacturers specify 13 to 16 inches of space between the stove top and microwave bottom. Professional installers suggest 18 to 24 inches of clearance to improve safety and functionality.
Here’s how to measure this space:
- Start from the highest point of your cooktop surface
- Measure vertically to where the bottom of the microwave will be positioned
- Verify this measurement meets manufacturer guidelines (typically minimum 13-14 inches)
- Note that gas ranges usually need more clearance than electric models
This distance affects both safety and how well you can use your microwave. A microwave mounted too low risks heat damage, while one mounted too high might not be available to everyone.
Cabinet height and microwave size
Your cabinet dimensions are vital in determining where to place your microwave. Built-in microwaves typically need a cabinet opening of 28½ inches width and 17⅝ inches height, with at least 21⅞ inches depth. On top of that, it needs 2 3/16 inches clearance above the opening and 1 inch below.
Key measurements for over-the-range installations:
The standard height from floor to microwave top is 66 inches, which creates about 13 inches between cooktop and microwave bottom. Many homeowners prefer 68 inches to improve usability.
Your microwave’s size substantially affects installation – standard over-the-range units are usually 16-17 inches tall. Low-profile options around 10¼ inches work well in kitchens with limited vertical space.
Here’s a pro tip: leave a bit of extra space in your cabinets instead of aiming for a perfect fit. This makes it easier to replace your microwave with a slightly different model later.
Using templates and mounting brackets
Templates take away the guesswork and ensure exact placement. Each model comes with specific templates that show you where to drill mounting screws and make cutouts for venting and power cords.
Over-the-range installations usually include:
- Top templates for cabinet bottom drilling
- Rear templates for wall mounting (used only with external venting)
- Mounting brackets that serve as their own templates
Many manufacturers offer digital versions online if your original template gets damaged or lost. These downloadable templates include all the dimensions you need for proper installation.
Mounting brackets are a great way to get the support these heavy appliances need. You’ll need to find wall studs that can hold the microwave’s roughly 50-pound weight. Microwave trim kits create a built-in look, while filler kits close gaps when cabinet openings are bigger than your microwave.
Venting and Safety Considerations
Proper venting plays a crucial role in over-the-range microwave installation. The right setup goes beyond just spacing between appliances. Good ventilation will extend your microwave’s life and keep your kitchen air clean.
Recirculating vs. external venting
Over-the-range microwaves come with two main venting options that work quite differently. Recirculating systems use charcoal filters to clean cooking air before sending it back into your kitchen. These filters catch some particles and smells but let heat and moisture stay inside. External venting takes a different approach by pushing air through ducts to the outside, which removes smoke, odors, and moisture from your kitchen.
External venting works better at removing cooking byproducts. This makes it perfect for homes with frequent cooking or gas ranges. You’ll need proper ductwork from your microwave to an outside vent to install a front-venting unit. Recirculating systems shine in their simple setup and save energy because they keep your conditioned air inside.
Heat damage and steam exposure risks
Placing microwaves close to cooking surfaces creates some risks. Too much heat and steam from your stovetop can hurt microwave parts and reduce how well they work. Heat sources make microwaves work harder to stay cool inside, which wears them out faster.
Steam can cause problems too, especially in cold areas. Moisture might collect under your microwave and drip onto food cooking below. These issues with moisture show why you need the right space between your range and microwave to avoid early electronic failures.
Impact on microwave lifespan and performance
Microwaves work better and last longer when installed correctly. The right setup reduces strain on parts by giving them enough air flow and space. Tight spaces that trap heat can make your microwave overheat and break down faster.
Pick a spot with plenty of airflow to help your microwave last longer. The right height above your stove makes your microwave safer and more durable. This becomes even more important with gas ranges because they create more intense heat than electric ones.
Customizing for Your Kitchen Layout
You’ll need creative solutions to set up the perfect distance between your range and microwave, especially with non-standard kitchen dimensions. Manufacturer guidelines give general recommendations, but most homes require custom approaches to balance safety and functionality.
Adapting for small kitchens or low ceilings
Small kitchens require smart planning to keep proper microwave clearance. Mounting a microwave right above the stove might seem impossible without breaking the recommended distance rules in kitchens with limited vertical space. Under-counter installations or dedicated shelf spaces that keep proper ventilation work well as alternatives.
Your actual cookware helps determine a safe yet functional height in kitchens with low ceilings. Rather than using generic recommendations, take out your largest pots and check the space you need. The space should allow the pot to sit on the stove and give room to lift lids and remove contents. Some homeowners found that there was a need for up to 38 inches from stovetop to the top of the microwave—a full 8 inches more than standard recommendations—to fit large cookware like canning pots.
When to modify cabinets or use filler panels
Standard configurations might not match your microwave installation needs, making cabinet modifications necessary. Filler panels solve the problem elegantly when cabinet openings are bigger than the microwave dimensions. These panels must go in before the microwave and can serve as simple fillers or decorative bookshelves.
Each filler panel should line up with the cabinet’s front edge and be firmly secured with provided wood screws. L-brackets or a nail gun from inside adjacent cabinets help remount the shelf at your desired height if you need to reposition the cabinet bottom.
Choosing low-profile microwaves
Limited vertical space in kitchens makes low-profile microwaves an excellent choice while keeping essential functions. These compact units are about 10.3 inches tall compared to standard 14-18 inch models. Modern low-profile microwaves come with:
- Surprisingly roomy interiors with capacity for items up to 7.7 inches tall
- Zero Clearance Door designs that enable flush installation against walls or cabinets
- Combined ventilation systems equivalent to standard range hoods
These space-saving models work best with 12-inch base cabinets. Installation with deeper cabinets might create larger gaps between the back wall and unit. Make sure to follow both microwave and cooking product installation manuals precisely to maintain proper distance between range and microwave.
Summing all up
The right placement of your over-the-range microwave affects both safety and how well your kitchen works. This piece shows how the space between your range and microwave affects your appliance’s life and daily use. Without doubt, manufacturer guidelines give you basic safety standards. Professional recommendations are a great way to get the best clearance to protect you and make cooking easier.
Note that every kitchen comes with its own challenges. The standard height of 66 inches from floor to microwave top works well in most homes. Your needs might be different based on how tall you are, how you cook, and the space you have. On top of that, your installation needs change based on whether you have a gas or electric range below.
You should never trade safety for convenience. Think over other options like low-profile microwaves or different spots when regular setups don’t work in your space. The right installation stops heat damage, makes your appliance last longer, and creates a better cooking space for everyone at home.
Take exact measurements with manufacturer templates before you start. Make sure your planned height works with your biggest pots and your shortest family members. Your microwave’s parts need good airflow to work well. This also keeps your indoor air clean.
A little extra work to get the right distance between your range and microwave ended up saving money. It stops headaches and creates a safer cooking space that lasts for years.
Here are some FAQs about the distance between range and microwave:
How do I know if my snake plant has too much water?
An overwatered snake plant will show yellowing leaves that feel soft and mushy at the base. The soil remains constantly wet, and you might notice signs of snake plant overwatered root rot like black, smelly roots. This differs from an underwatered overwatered snake plant comparison where dry plants have wrinkled, crispy leaves instead.
Can an overwatered plant recover?
Yes, an overwatered snake plant can recover if caught early and proper corrective steps are taken. For snake plant overwatered cases, immediate action includes removing the plant from wet soil and trimming any rotten roots. The key is addressing the overwatered snake plant root rot before it spreads throughout the entire root system.
Should I cut off drooping snake plant leaves?
You should cut off severely drooping leaves on an overwatered snake plant if they’re yellow or mushy at the base. However, in the snake plant overwatered vs underwatered comparison, slightly wilted leaves from underwatering may recover with proper hydration. Always use clean shears and remove only the damaged foliage.
Is it better to overwater or underwater snake plants?
It’s significantly better to underwater than overwater snake plants, as they’re extremely drought-tolerant. In the snake plant overwatered vs underwatered scenario, overwatering causes root rot while underwatering causes temporary stress that’s easily fixed. These plants store water in their leaves and prefer dry conditions between waterings.
Can a snake plant recover from overwatering?
A snake plant can recover from overwatering if the overwatered snake plant root rot hasn’t progressed too far. The recovery process involves repotting in fresh, well-draining soil and removing all affected roots. An overwatered snake plant may take weeks to months to fully recover, depending on the damage extent.
What does a dehydrated snake plant look like?
A dehydrated snake plant in the underwatered overwatered snake plant comparison shows wrinkled, curling leaves that feel dry and crispy. Unlike an overwatered snake plant with yellow, mushy leaves, underwatered plants maintain firmness but appear shriveled. The soil will be completely dry and may pull away from the pot edges.
How to fix an overwatered plant fast?
To quickly fix an overwatered snake plant, first remove it from soggy soil and inspect for root rot. Trim any black, mushy roots from the snake plant overwatered root system, then repot in fresh cactus mix. Allow the overwatered snake plant to dry out completely before resuming minimal watering.
Can plants feel pain?
No scientific evidence suggests plants feel pain as they lack nervous systems and brains, even when discussing an overwatered snake plant’s distress. While plants like snake plants show physical responses to overwatered snake plant conditions, these are biochemical reactions rather than conscious experiences of discomfort or suffering.