Corrugated Plastic Roofing
Corrugated plastic roofing delivers 20 times more strength than fiberglass, making it one of the most resilient construction materials accessible to more people today. More builders choose this material for patios, greenhouses, and commercial structures because of its outstanding durability.
These roofing panels keep their look and performance longer than traditional materials that wear down quickly. The panels handle extreme temperatures from -40°F to +270°F, which means they work well in any climate. Their octagonal-wave design helps distribute weight better during high winds and heavy snow. Clear corrugated plastic shields anything underneath from UV rays while staying tough against harsh weather, wind and hail. The best performance comes from installing these panels with a minimum 5% slope, though some experts suggest at least 1-1/2″ for every 12″ of roof.
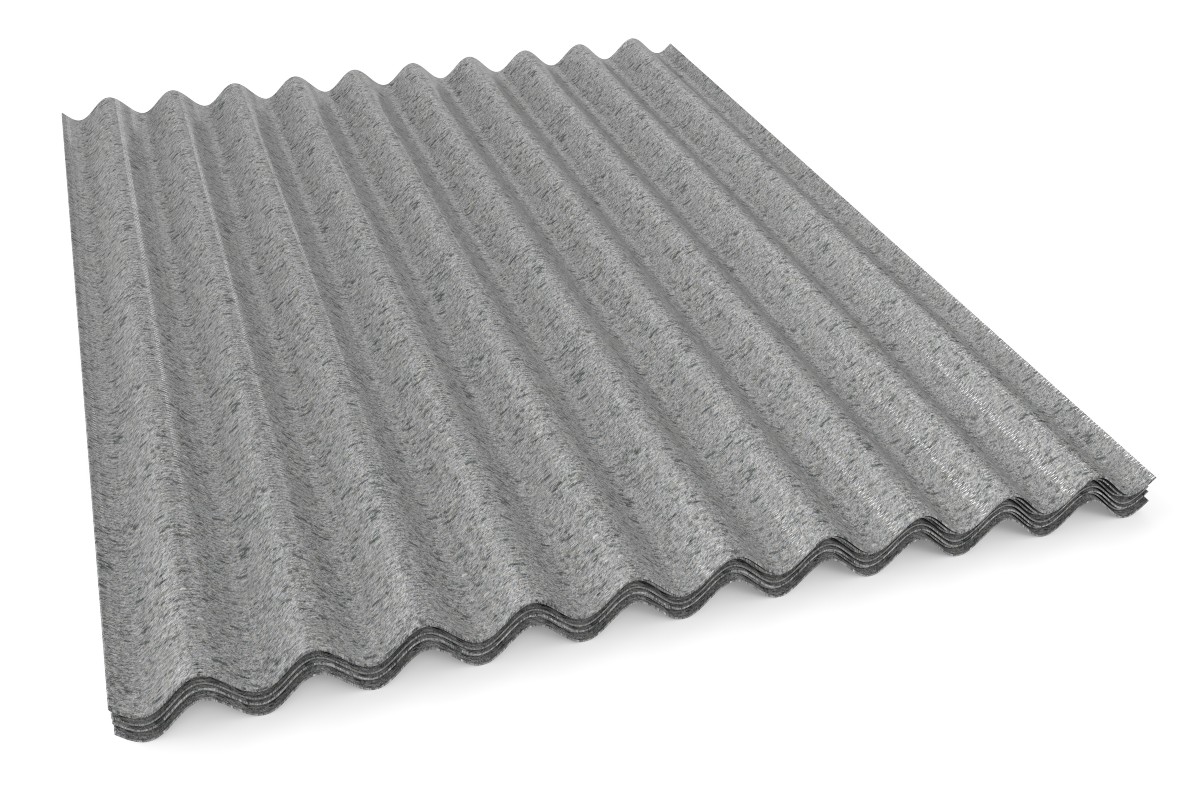
Table of Contents
- 1 What is Corrugated Plastic Roofing?
- 2
- 3 Key Benefits of Corrugated Plastic Roof Panels
- 4 How to Install Corrugated Plastic Roofing Panels
- 5 How to Cut Corrugated Plastic Roofing Without Damage
- 6 Common Mistakes Installers Don’t Mention
- 7 Summing all up
- 8 Here are some FAQs about the corrugated plastic roofing:
- 8.1 How do you fasten corrugated plastic roofing?
- 8.2 What is plastic corrugated roofing called?
- 8.3 Is metal or plastic corrugated roofing better?
- 8.4 How strong is corrugated plastic roofing?
- 8.5 What is the best adhesive for corrugated plastic?
- 8.6 What is the best way to cut plastic corrugated roofing?
What is Corrugated Plastic Roofing?
Corrugated plastic roofing is a versatile building material that features a wave-like pattern and comes from thermoplastic polymers. These panels are lightweight yet durable, which makes them perfect for greenhouses, carports, patio covers, and agricultural buildings.
Understanding the material composition
Manufacturers make corrugated plastic roofing sheets mainly from thermoplastic polymers that last long and stay strong. They usually create these sheets from polypropylene, polyethylene, or polycarbonate. The sheets come to life through extrusion – pumping liquid plastic through special dies creates that distinct corrugated design. The final products can be up to 25mm thick, depending on the die they use.
These materials have a neutral pH, so they resist chemical corrosion really well, especially the polypropylene-based ones. Manufacturers add special ingredients to help the sheets handle UV rays better and resist fire. The plastic roofing might be light, but it stands up to extreme weather. Some types work fine in temperatures from -40°F all the way up to +270°F.
How corrugation adds strength and flexibility
The wavy texture of corrugated roofing makes it much stronger. Think about a flat piece of paper compared to one folded like an accordion – the folded one is way more rigid. The same idea works here – the corrugation turns basic plastic sheets into tough roofing materials.
This special pattern creates an octagonal wave shape that makes the material stronger and more rigid. The roofing can hold lots of weight even though it’s light. Water runs off naturally through the channels in the design, so it won’t pool up and cause leaks or damage.
The wave-like structure helps handle temperature changes too. Roofing materials expand and contract as temperatures go up and down. These corrugated sheets can move without putting stress on the fasteners, which means they’re less likely to crack or wear out than flat panels.
Common types: polycarbonate, PVC, fiberglass
You’ll find several different kinds of corrugated plastic roofing, and each one works best for specific uses:
Polycarbonate panels lead the pack with their amazing strength and durability. These nearly unbreakable sheets are 200 times stronger than glass of the same thickness. They also have great UV protection that keeps them from turning yellow. You’ll pay more for these panels, but they can last 20-30 years with proper installation.
PVC (polyvinyl chloride) panels cost less, running about $1.50 to $2.50 per square foot compared to $2.00 to $3.00 for fiberglass. Made from chlorine and ethylene, PVC roofing lets plenty of light through. It’s not as tough as polycarbonate, but homeowners like it because it’s budget-friendly.
Fiberglass panels let lots of natural light in with their translucent finish, which works great when you need good lighting. They’re not quite as tough as polycarbonate but handle weather well and usually last 20-30 years. Light coming through these panels looks softer and more diffused than through other options.
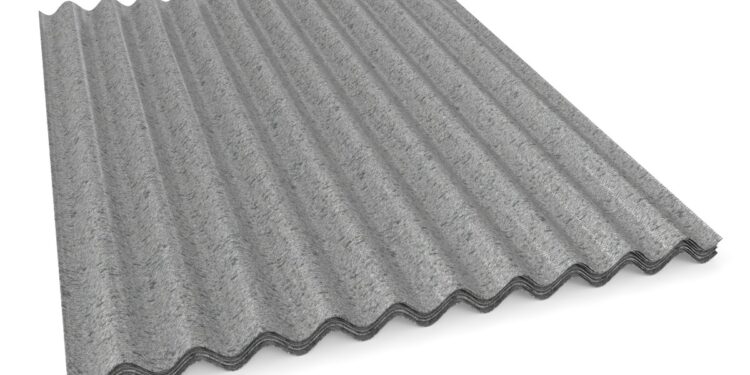
Each type comes in different thicknesses and profiles. You’ll see common styles like the traditional “ASB” profile (which looks like old asbestos sheeting), “big 6,” “greca” (box section), and tiny corrugations. The profile you pick affects both how it looks and how well it works.
Key Benefits of Corrugated Plastic Roof Panels
Corrugated plastic roof panels give property owners excellent value. They combine durability, protection, and practical benefits that regular roofing materials can’t match. These strong yet lightweight materials have caught on with homeowners and businesses because they work so well.
High impact resistance and durability
The structural integrity of corrugated plastic roofing stands out. Polycarbonate panels are tough – 20 times stronger than fiberglass and 250 times stronger than glass. These panels won’t shatter or crack when hit by hail, flying debris, or direct strikes.
The panels are tough because they contain bisphenol A (BPA), which keeps them flexible while staying strong. They can take over 235 pounds per inch of impact. This makes them nearly unbreakable in normal use.
Property owners looking at long-term value will appreciate that these panels last 20-30 years when installed properly. They resist wear and tear that ruins other roofing materials.
UV protection and light transmission
Polycarbonate roofing blocks UV rays better than most materials. The panels stop almost all UVA and UVB radiation. Even thin sheets block so much UV that they “would provide far better protection to the skin and eyes than any sun protection cream”.
UV blocking works two ways. People and items under the roof stay protected from harmful rays. Manufacturers also add special UV coatings so the panels don’t turn yellow or break down. The panels keep their clear look for decades, even in bright sun.
Natural light still comes through easily, creating bright spaces without UV damage. This balance makes these panels perfect for sunrooms, greenhouses, pool covers, and walkways.
Weather resistance and temperature tolerance
These panels handle all kinds of weather. They work fine in temperatures from -40°F to 240°F without losing strength. This means they fit any climate.
The panels stand up to many weather challenges:
- Moisture resistance: Water runs off the ridges easily, and no moisture gets through
- Wind resistance: The eight-sided wave pattern spreads out wind force
- Chemical resistance: Many types resist chemicals and pollution
- Fire resistance: Some panels stop burning when the fire source goes away
This strong weather protection lets the panels handle tough conditions like hail, rain, sleet, snow, and storms. They won’t fade, crack, or get weak.
Lightweight and easy to handle
The panels weigh just 1/8 as much as glass. This lighter weight means buildings need less support structure, which saves money on materials and work.
Light panels make every step easier. Shipping costs less than with metal panels. Workers can move and place panels easily, even in tight spots.
People who like DIY projects can handle these panels without special tools or extra help. The panels’ light weight and simple installation help keep costs down for many different uses.
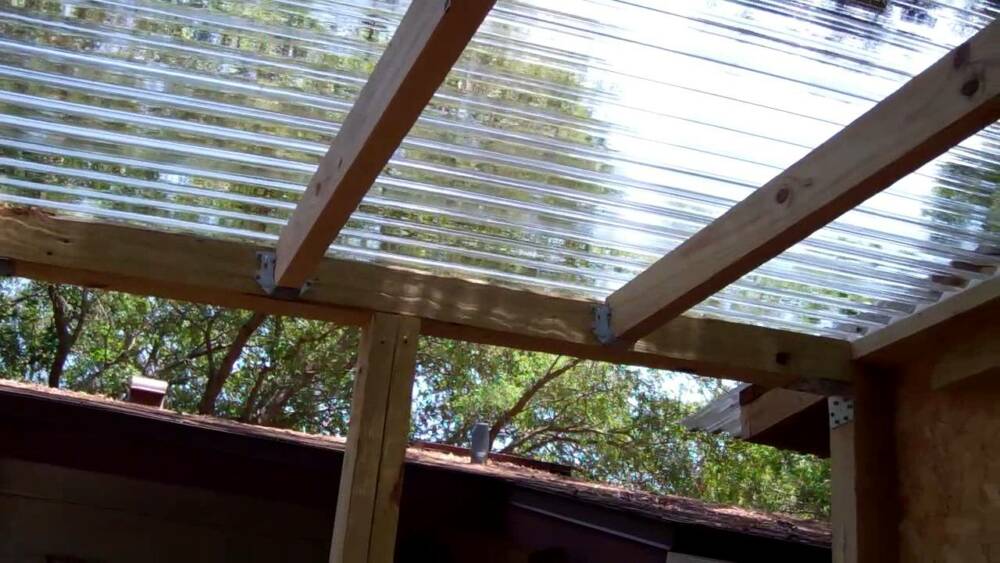
How to Install Corrugated Plastic Roofing Panels
Installing corrugated plastic roofing needs careful planning and the right technique to make it durable and weather resistant. A proper installation will extend your roofing’s lifespan and prevent systemic problems like leaks and damage from poor fastening.
Tools and materials you’ll need
Your project requires these tools: a circular saw with fine-tooth blade, drill with 1/4″ bit, tape measure, utility knife, straight edge, sawhorses, ladder, and tin snips. The materials list includes corrugated plastic panels, foam closure strips, fasteners with neoprene washers, ridge caps, and 100% silicone sealant that works with polycarbonate.
Step-by-step installation process
- Calculate your roof area to determine panel quantity.
- Check if purlins (horizontal supports) exist. Space them 800mm apart for first and last purlins and 1 meter for ones in between.
- Add foam closure strips on purlins before panel installation.
- Start installation from the side opposite to common wind direction.
- Place the first panel square to the structure.
- Make sure the UV-protected side faces up by checking labels or ink tattoo marking.
- Move systematically from left to right or right to left, not from both sides toward middle.
- Overlap panels by at least one corrugation for multiple panel setups.
Tips for proper alignment and overlap
A watertight seal needs proper overlapping. Roofs with pitches over 10° need one corrugation overlap, while those under 10° need two. Lengthwise overlaps follow specific rules: 18cm for 15° or steeper pitches, 22cm for 10-15° pitches, and 32cm for 5-10° pitches.
Fastening techniques for long-term hold
Make pre-drilled holes 1.5mm larger than your fastener diameter to let thermal expansion happen. Panels longer than 3.6m need 10mm holes for more expansion room. You can also use specialized fasteners like POLY-FAST™ that create expansion holes during installation.
How to attach corrugated plastic roofing correctly
Roof applications need fastening through peaks of every second or third corrugation. Wall applications require fastening through valleys. Start fastening from the bottom edge up to the top—never fasten both ends first. The rubber washer should compress the panel slightly without distorting it. Secure sheet edges at every other corrugation near ridges and gutters.
How to Cut Corrugated Plastic Roofing Without Damage
The right cutting techniques can make a huge difference when you work with corrugated plastic roofing. Poor cuts often lead to cracks and jagged edges that can reduce your roofing investment’s lifespan.
Choosing the right tools: knife vs. saw
A utility knife or Stanley knife gives you excellent control and precision with thinner corrugated plastic sheets. You’ll need to score along your marked line and gradually increase pressure with each pass until the sheet snaps cleanly. Thicker panels need a circular saw with a fine-toothed blade designed for plastics. Stay away from jigsaws because their vertical motion creates too much vibration that damages panels.
Marking and measuring for precision
Start by laying your corrugated panel on a flat, stable surface. Take measurements with a tape measure to get precise dimensions, then mark your cutting lines with a felt-tipped marker. A metal ruler or straight edge works great as a guide for straight cuts. The sheet should extend about an inch beyond your work surface edge so you can cut more easily.
Safety precautions during cutting
You can’t skip safety gear when cutting corrugated plastic. Protective goggles, gloves, and a dust mask are vital to protect yourself from debris. What you wear matters too – keep your skin covered and avoid shorts. Set up a workspace with plenty of room away from distractions. Large panels might need an extra set of hands to hold them steady while you cut.
Smoothing edges for a clean finish
Smooth all edges with an emery cloth or fine-grit sandpaper right after cutting. This vital step gets rid of sharp burrs that could hurt someone or create leak points after installation. You can carefully run a sharp knife along really rough edges to remove stubborn burrs.
Note that temperature plays a role in how easy cutting becomes – corrugated plastic gets a bit more brittle in cold weather, so you’ll need to be more careful. The good news is you can get professional results whatever time you tackle your project, as long as you use the right technique and tools.
Common Mistakes Installers Don’t Mention
DIY enthusiasts make serious mistakes while installing corrugated plastic roofing. Professional installers rarely mention these errors that can cut your roofing investment’s lifespan.
Ignoring thermal expansion gaps
Homeowners often install corrugated plastic panels too close together. These materials expand and contract by a lot with temperature changes – up to 3mm per meter in length. Your panels can buckle, warp, or crack during hot weather without proper expansion gaps of at least 5mm between sheets. You should increase this gap to prevent damage that can get pricey on longer spans.
Incorrect slope and drainage setup
Poor roof pitch causes many installations to fail. Your corrugated plastic roofing needs a minimum slope of 5° (approximately 1:12 or 1 inch rise per foot of run). Lower slopes create water pooling that speeds up deterioration and creates potential leaks. Drainage channels must stay clear of closure strips or sealant that could redirect water under panels instead of away from them.
Using the wrong fasteners or sealants
Your choice of fasteners can make or break the installation. Regular wood screws or nails will rust over time and stain panels while creating leak points. You should use specially designed polycarbonate-compatible fasteners with EPDM washers instead. A vital warning – avoid silicone caulks with acetic acid (they smell like vinegar) because they react with polycarbonate and cause cracking and early failure.
Overtightening screws and causing cracks
Fastener tension remains the most common preventable mistake. Stop when the washer touches the panel surface rather than tightening screws completely. Too much compression of the neoprene washer limits natural expansion and creates stress points that crack later. A correctly tightened fastener lets the panel move slightly while keeping water out.
Summing all up
Corrugated plastic roofing is an outstanding material that works great for many roofing projects. These panels are remarkably durable and can handle extreme temperatures from -40°F to +270°F, making them perfect for any climate. Their light weight makes installation easier while they stay structurally strong.
You should think over which type matches your needs best. Polycarbonate gives you the best durability and clarity but costs more. PVC makes a good budget option that performs well enough. Fiberglass works great when you need excellent light diffusion.
Getting the installation right is vital to make your corrugated plastic roofing last longer. Your project’s success depends on paying attention to the right slope, choosing proper fasteners, and using exact cutting techniques. Watch out for common mistakes like missing thermal expansion gaps or tight screws that can lead to early failure and costly fixes.
These panels do more than just traditional roofing. They shine in greenhouses, carports, patio covers, and farm buildings. Their tough impact resistance and UV protection help them last a long time whatever the weather throws at them.
Many traditional roofers overlook corrugated plastic roofing, but it’s worth a serious look when you need something durable that lets light through and stands up to weather. Install it right, keep it maintained, and these panels will protect your property for decades. With a 20-30 year lifespan, they offer great value and performance.
Here are some FAQs about the corrugated plastic roofing:
How do you fasten corrugated plastic roofing?
Corrugated plastic roofing is typically fastened using specialized screws with rubber washers designed for plastic roofing panels. These fasteners should be installed in the crest of the corrugations, not the valleys, to ensure proper water runoff. When installing plastic roofing sheets, space the screws approximately every 12-18 inches along each support for optimal holding power without causing stress cracks.
What is plastic corrugated roofing called?
Plastic corrugated roofing is commonly referred to as corrugated plastic roofing or simply plastic roofing panels in the construction industry. These clear plastic roofing or translucent panels are also known by brand names like Coroplast or Twinwall polycarbonate. The material differs from traditional plastic roofing sheets in its distinctive wavy pattern that provides added strength.
Is metal or plastic corrugated roofing better?
The choice between metal and corrugated plastic roofing depends on your specific needs – plastic roofing panels offer better light transmission and won’t rust, while metal provides greater durability. Clear plastic roofing is often preferred for applications requiring natural light, like greenhouses or patio covers. Plastic roofing sheets generally cost less and are easier to cut than metal alternatives, but may not last as long in extreme weather conditions.
How strong is corrugated plastic roofing?
Corrugated plastic roofing provides surprising strength for its lightweight nature, capable of withstanding typical snow and wind loads when properly installed. The strength of plastic roofing panels comes from their corrugated design, which adds rigidity to the material. While not as strong as metal, these plastic roofing sheets offer sufficient durability for many residential and agricultural applications at a fraction of the weight.
What is the best adhesive for corrugated plastic?
For bonding corrugated plastic roofing, polyurethane-based adhesives or specialized plastic roofing adhesives work best. When joining plastic roofing panels, look for products specifically designed for polyethylene or polycarbonate materials. Clear plastic roofing repairs may require UV-resistant adhesives to maintain transparency and prevent yellowing over time.
What is the best way to cut plastic corrugated roofing?
The best way to cut corrugated plastic roofing is with a fine-toothed circular saw or jigsaw set to a medium speed. For plastic roofing sheets, you can also use a utility knife with multiple scoring passes along a straight edge. When cutting clear plastic roofing, support the material properly to prevent cracking and consider using masking tape along the cut line to reduce chipping.